

Turn on compositing and key a performer
Tap Off at the top. The CAMERA/KEY menu opens.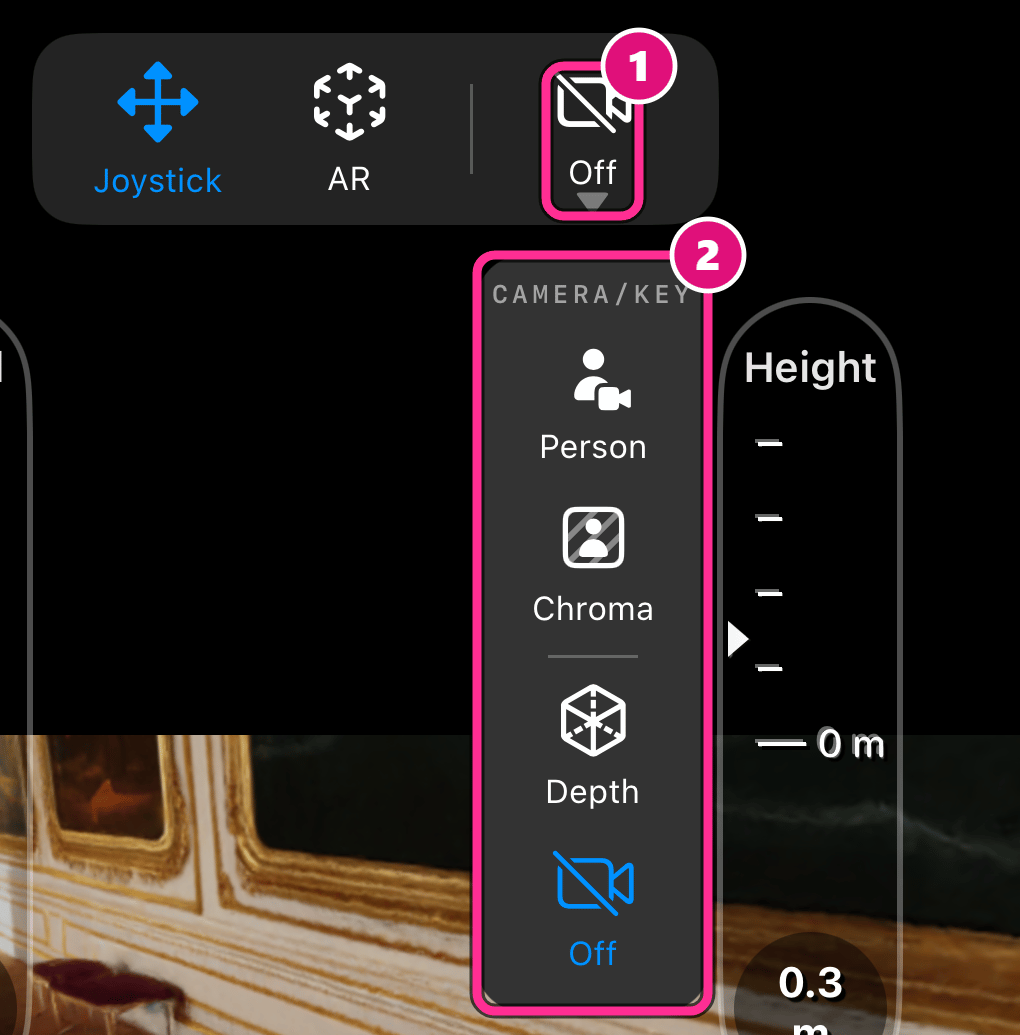
- Camera button
- CAMERA/KEY
- Person: AI segmentation mattes the performer into the 3D scene, with no green screen
- Chroma: keys out a green or blue screen, and gives a cleaner key than segmentation
- Off: records the 3D scene with no camera
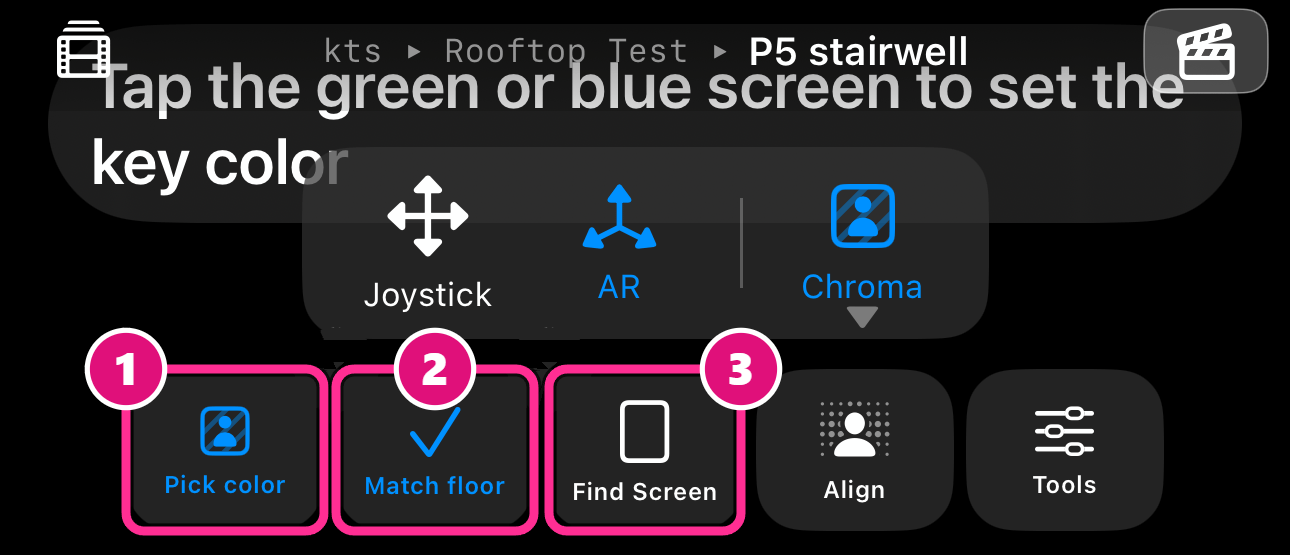
- Pick color
- Match floor
- Find Screen
- Find Screen finds the edges of a small screen, and the 3D scene fills everything outside it.
- Clip black and Clip white in Tools fine-tune the key.
Views and switches
Tap Tools to switch views and set what shows on screen.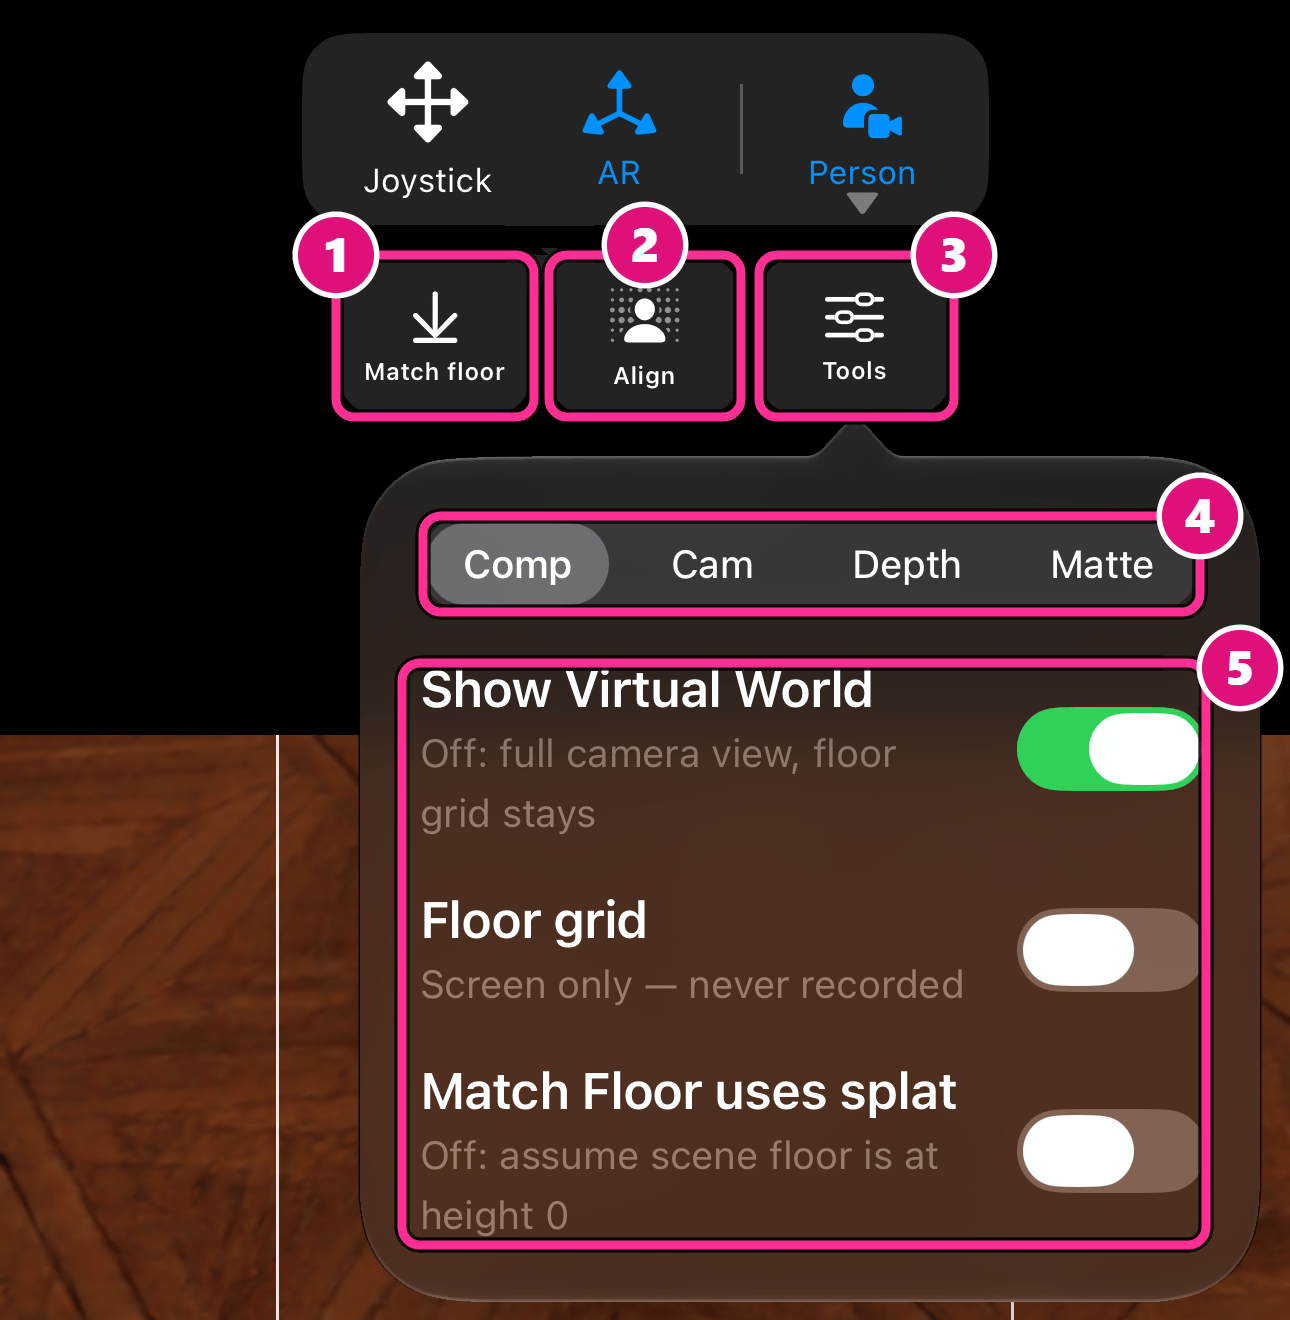
- Match floor
- Align
- Tools
- Views
- Switches
Place a performer
Point the camera at the real floor and tap Match floor. It measures the distance and sets your height, then shows a tick. It can’t run while you’re locked to a camera. Tap Align to seat the performer in the scene, such as behind a desk or in a car seat.Record a take
- Pick the setup and camera. See Camera setups on iPhone.
- Tap Record. The button shows the time and the take number.
- Tap it again to stop.
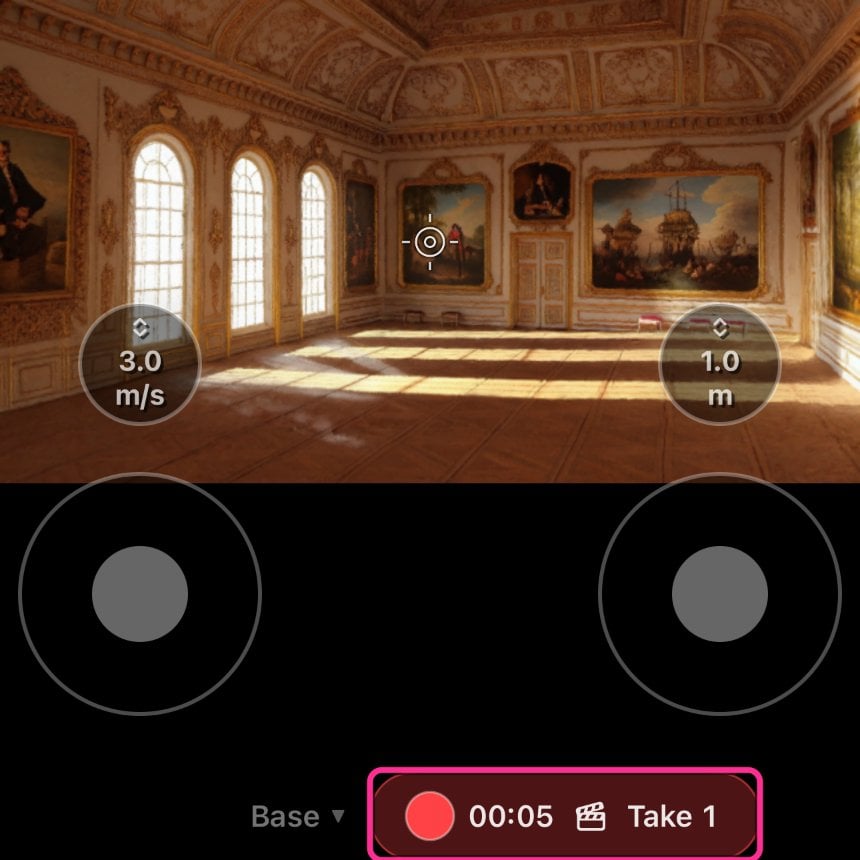
Recording claims the camera, so screen sharing over Zoom or Meet stops until the take ends.
Render now or later
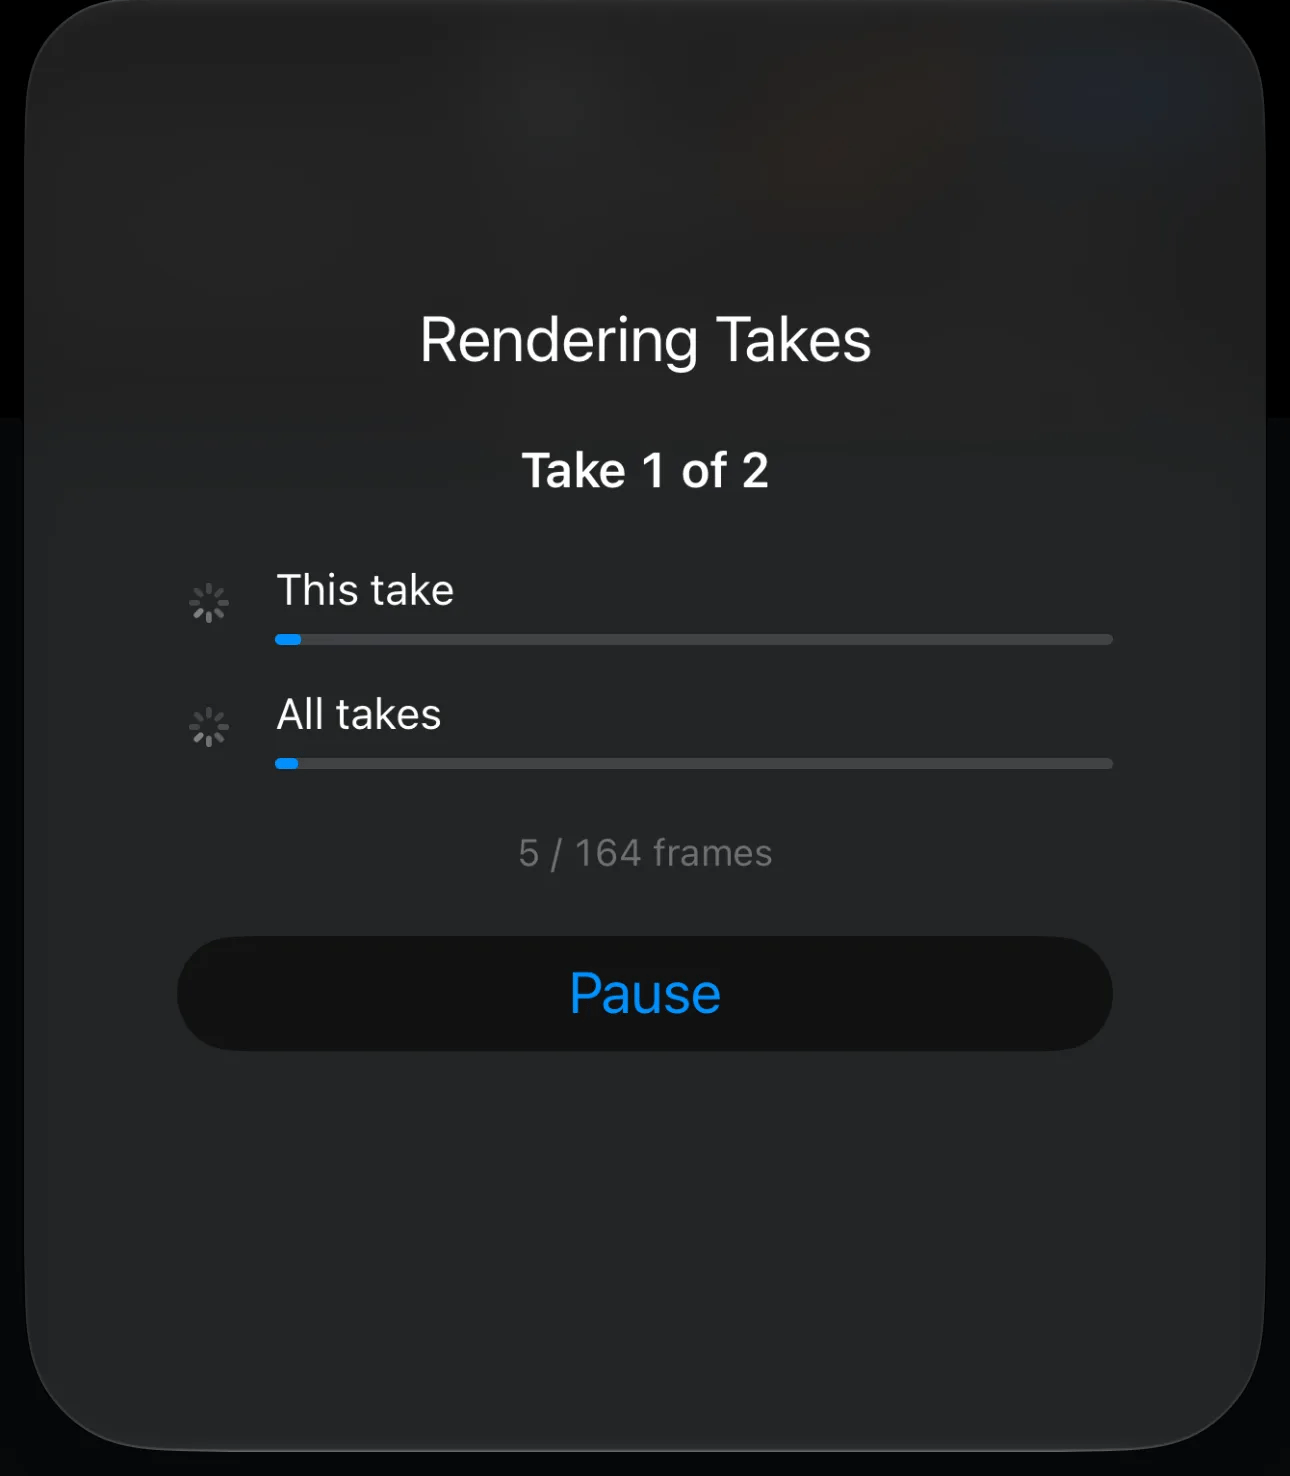
Tap the clapperboard to open Takes. A new take shows Render and Upload.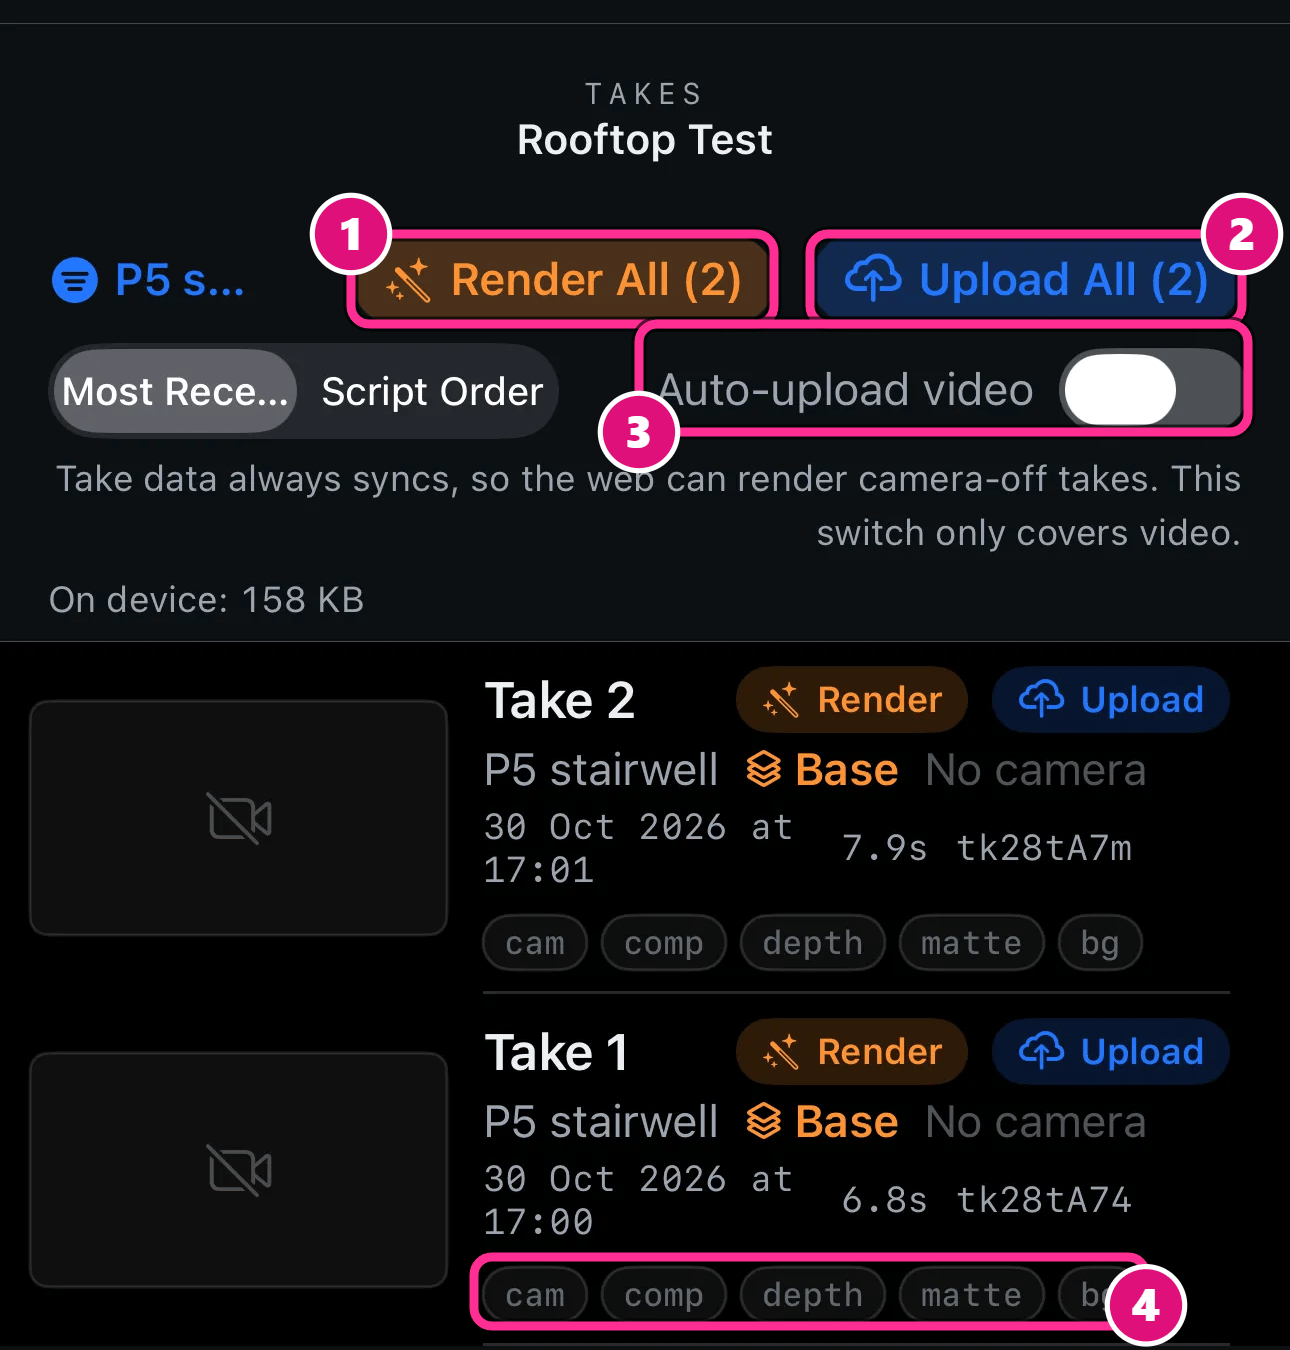
- Render All
- Upload All
- Auto-upload video
- Layers
Record offline, sync later
A take recorded offline saves on the iPhone. It syncs to the web app when the iPhone reconnects.Take files on the device
Each take keeps its elements as separate files, sorted by production, then script scene.Related
Upload takes from iPhone
Send takes to the Gallery.
Browse and play takes
See every take in the Gallery.