

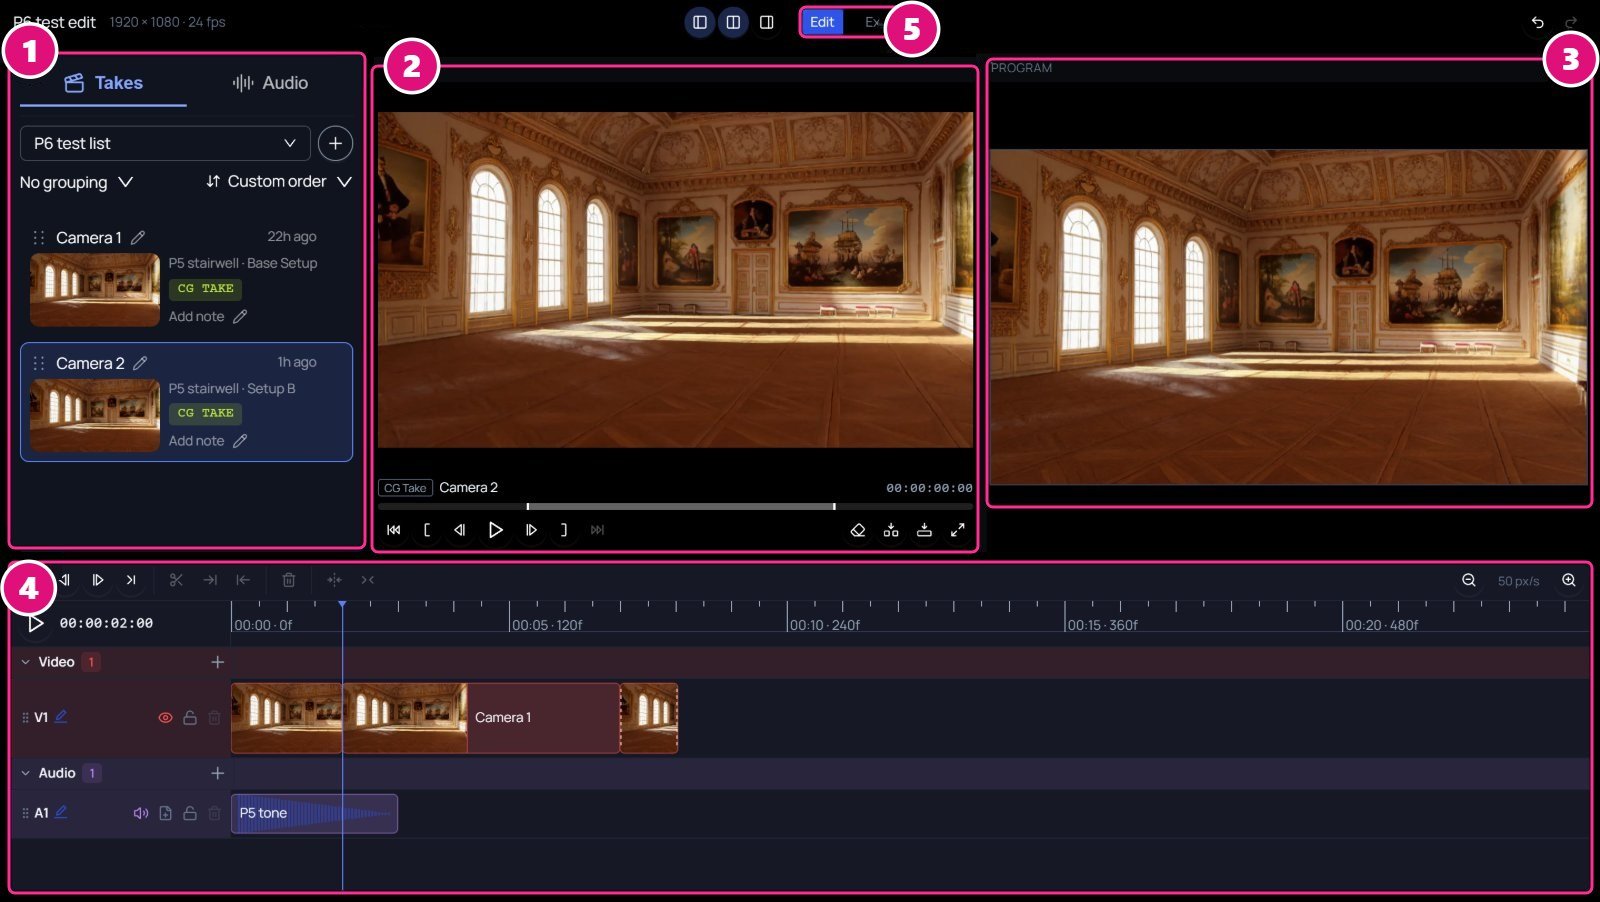
- Takes and Audio
- CLIP viewer
- PROGRAM viewer
- Timeline
- Edit and Export
- The CLIP viewer plays the take or clip you pick.
- The PROGRAM viewer plays the edit.
- The timeline has a Video lane, V1, and an Audio lane, A1. Click + beside Video or Audio to add a lane.
Create an edit
- Click the Editor tab at the bottom of the production.
- Click New edit. It opens as Untitled Edit, 1920 × 1080 at 24 fps.
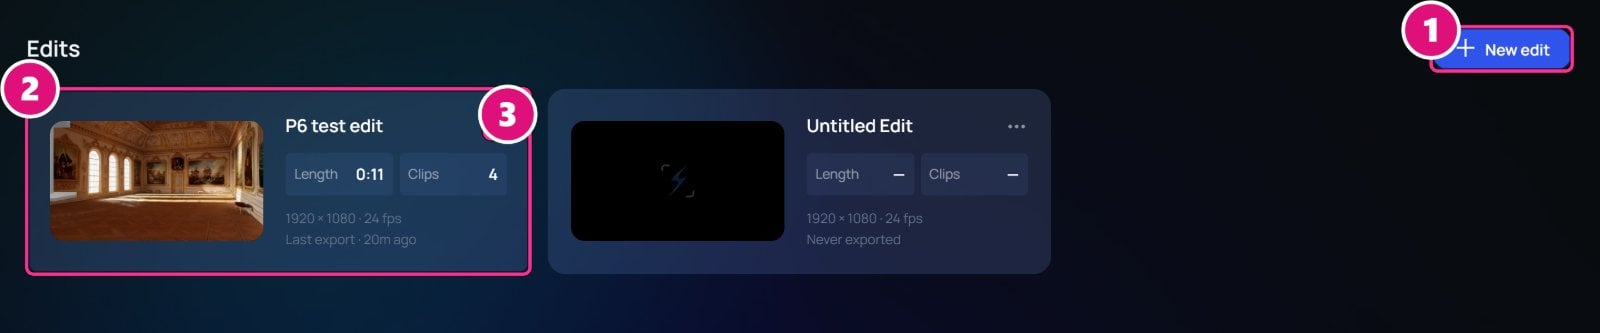
- New edit
- Edit
- …
Cut takes into an edit
Pick where the takes come from
On the Takes tab, open the picker. It lists every script and every list in the production, and New list….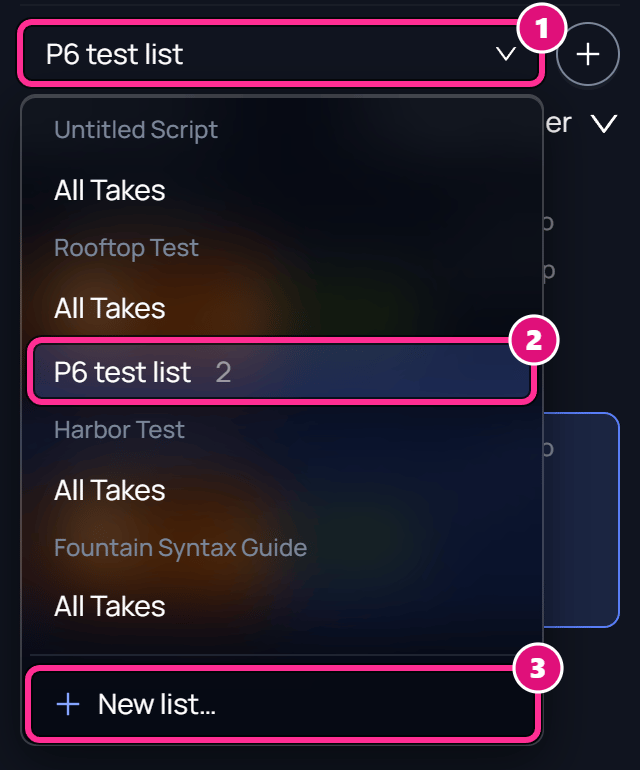
- Picker
- A list
- New list…
Mark the part you want
Click a take to load it in the CLIP viewer. Move the playhead and click Mark in, then move it again and click Mark out. A still from a STATIC CG Take can’t be marked.

Editor keys
Editor keys
Replace a clip
Replace swaps a clip for another take, CG Take or audio file. The new clip starts where the old one did, and nothing else on the timeline moves.- Drag a take from the left column onto a clip. The clip shows an amber Replace tag, and a tint over the part the new material fills. Then let go.
- Or move the playhead onto the clip and load the new material in the CLIP viewer. Then click Replace, or press R.
Open a take in its 3D scene
On a take’s … menu in the left column, click Open in 3D scene. The 3D scene opens with the take’s camera selected.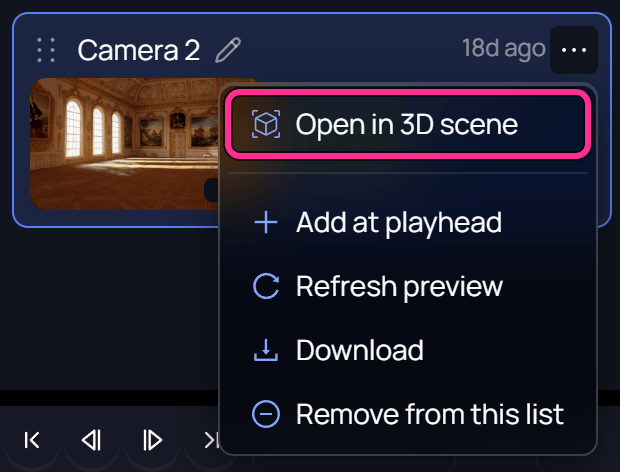
- A take recorded with no camera selected opens its 3D scene with nothing selected.
- A take that isn’t linked to a 3D scene shows the item grayed out.
- Ctrl+click opens the 3D scene in a new tab.
Choose which video a clip plays
A clip cut from a Take can play any of its videos: Comp, BG, Camera, Matte or Depth. A CG Take is one video. Select a clip to see its properties in the inspector (Shift+I). There you can set the clip’s framing, rotate it 90° either way, or mute it. A clip hidden under a higher lane is flagged It will not appear in the export.Related
Add audio and export
Add sound, then export an MP4.
Browse and play takes
Find a take and play it.