
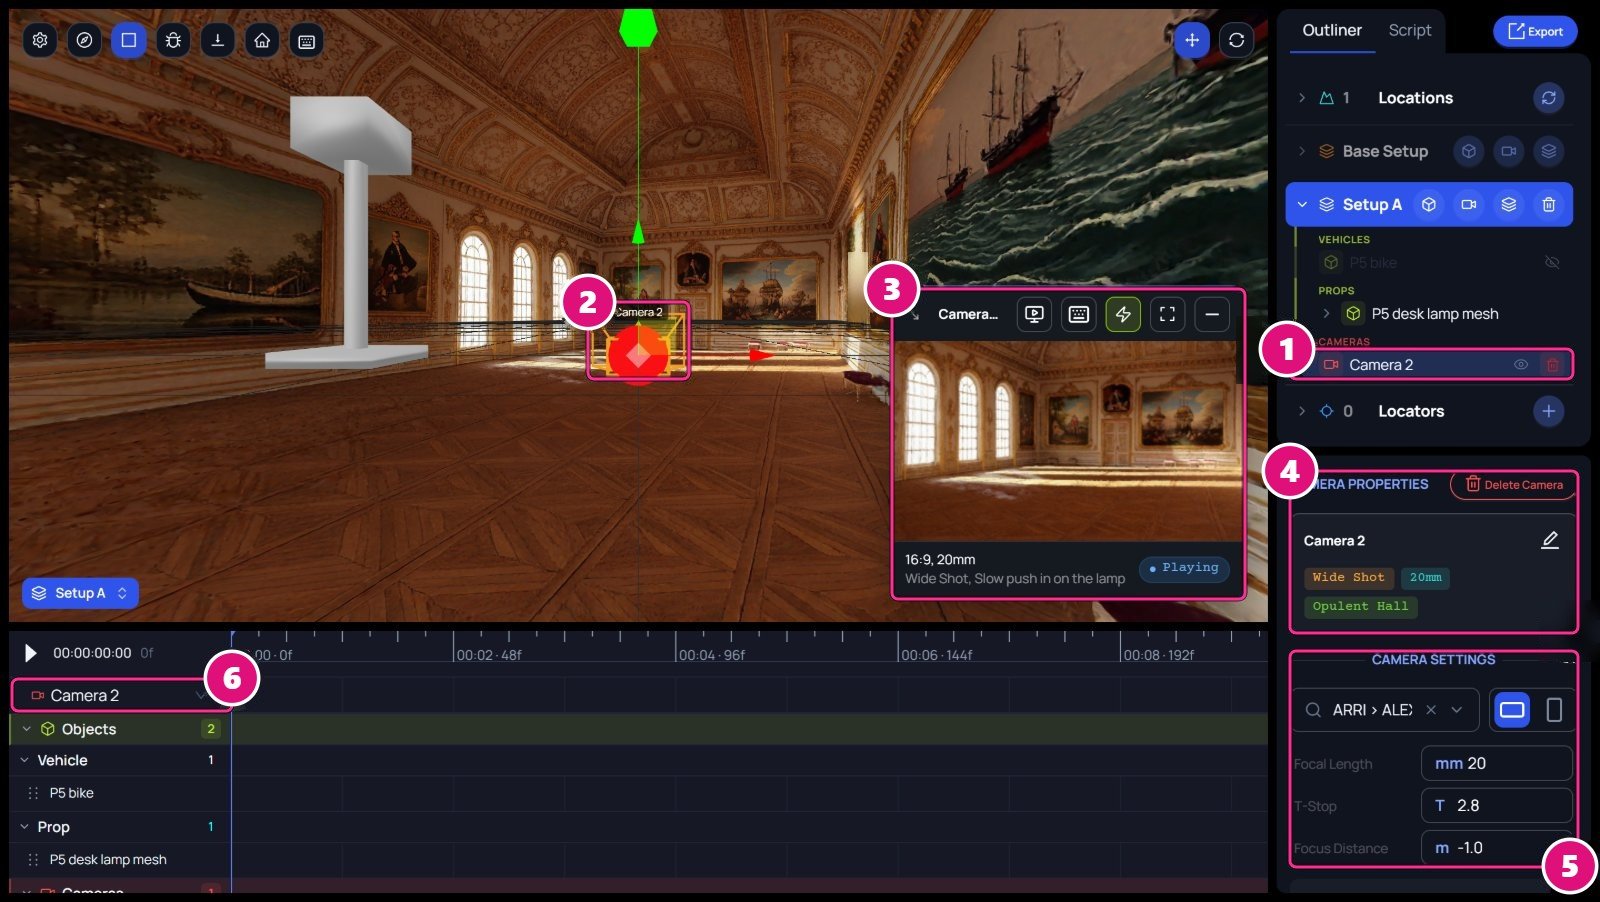
A camera belongs to one setup and sees that setup’s arrangement. Its view shows in the camera preview. Cameras appear in the 3D canvas as camera icons with an orange frustum showing their field of view. The scene editor with Camera 2 selected. Box 1 is on its Outliner row, 2 on the camera in the canvas, 3 on the camera preview, 4 on Camera Properties, 5 on Camera Settings and 6 on its Timeline row.
  1. Camera row
  2. Camera in the canvas
  3. Camera preview
  4. Camera Properties
  5. Camera Settings
  6. Timeline row

Add a camera

1

Open New Camera

On the setup’s row in the Outliner, click Add a camera to this setup.The Setup A row, with a box on its Add a camera to this setup button.
2

Describe the camera

Name it, pick its preset, framing and subject, and say what it does in Action. Then click Place Camera.The New Camera window for a camera on Setup A. Boxes 1 to 6 are on Camera Name, Camera Preset with the landscape and portrait toggle, Framing, Subject, Action and Place Camera.
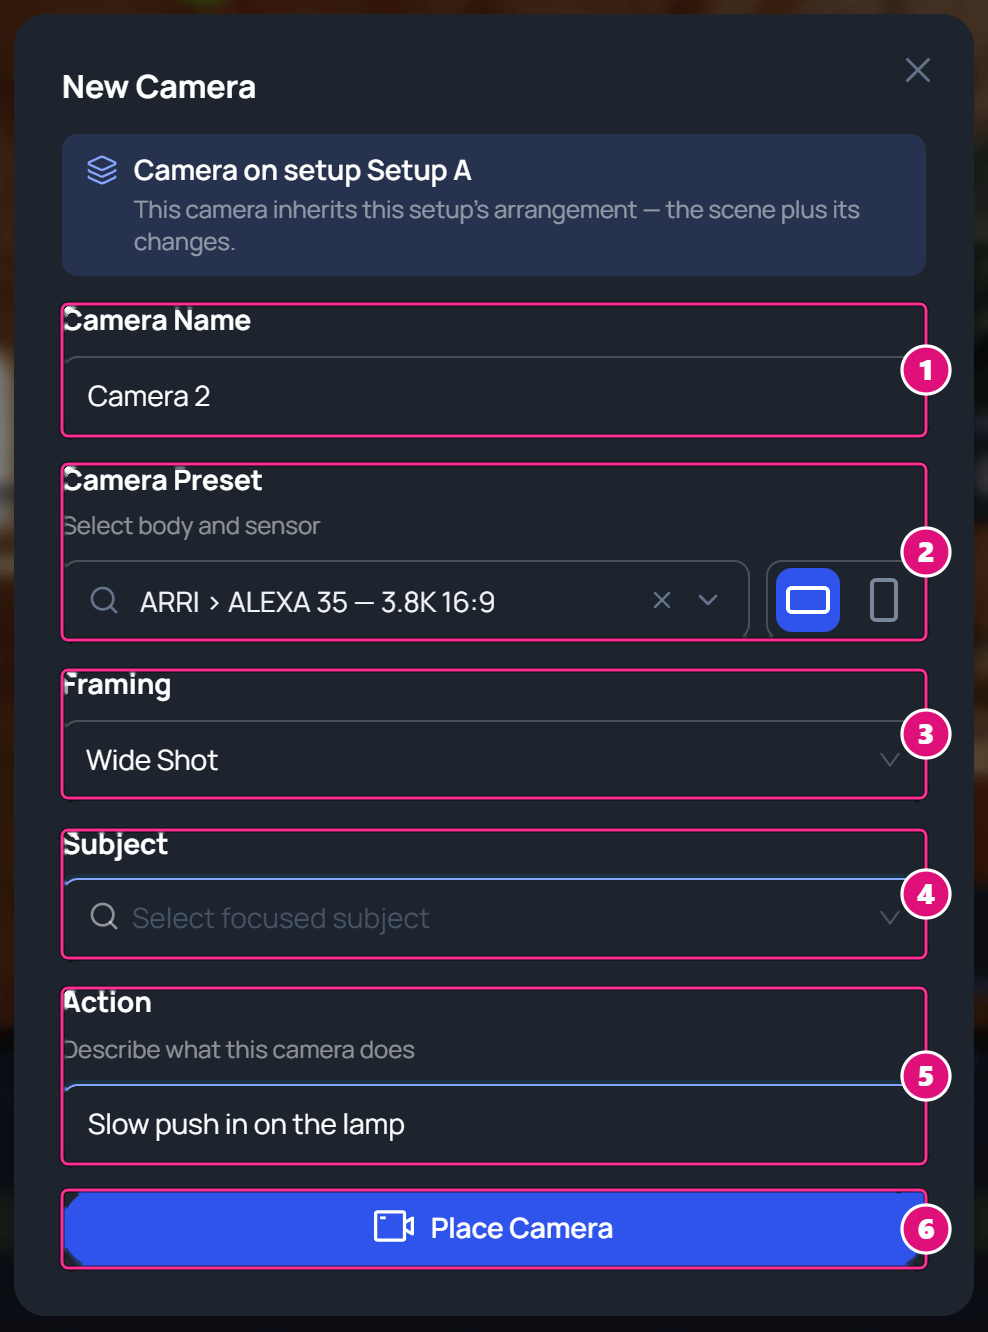
  1. Camera Name
  2. Camera Preset
  3. Framing
  4. Subject
  5. Action
  6. Place Camera
Framing runs from Extreme Wide Shot to Extreme Close-Up. Subject lists the scene’s objects.
3

Place it

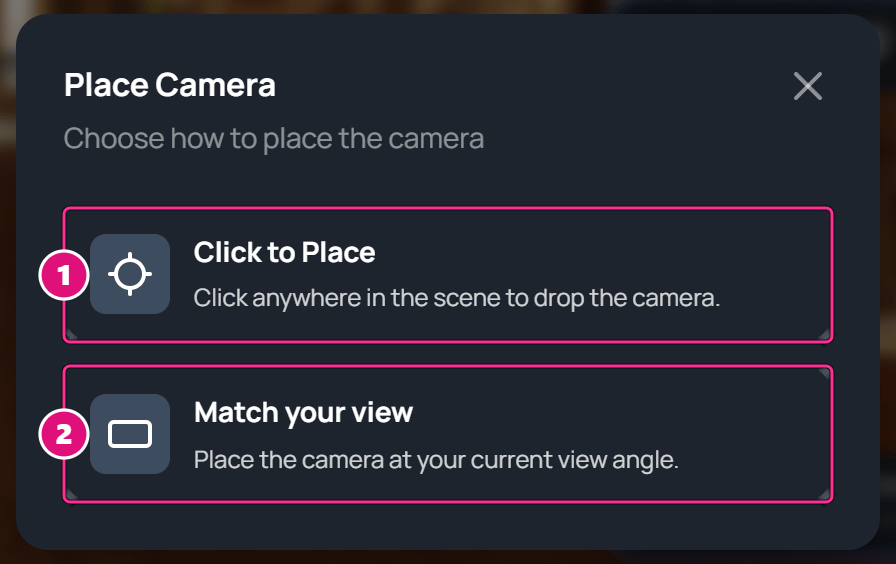
Click to Place drops the camera where you click in the scene. Match your view places it at your current view angle.The Place Camera window. Box 1 is on Click to Place and 2 on Match your view.
  1. Click to Place
  2. Match your view

Camera Properties

Click a camera’s row to open Camera Properties. The card at the top shows its framing, focal length and location. Camera Properties for Camera 2. Box 1 is on Delete Camera, 2 on the pencil, 3 on the camera preset, 4 on Focal Length, 5 on T-Stop and 6 on Focus Distance.
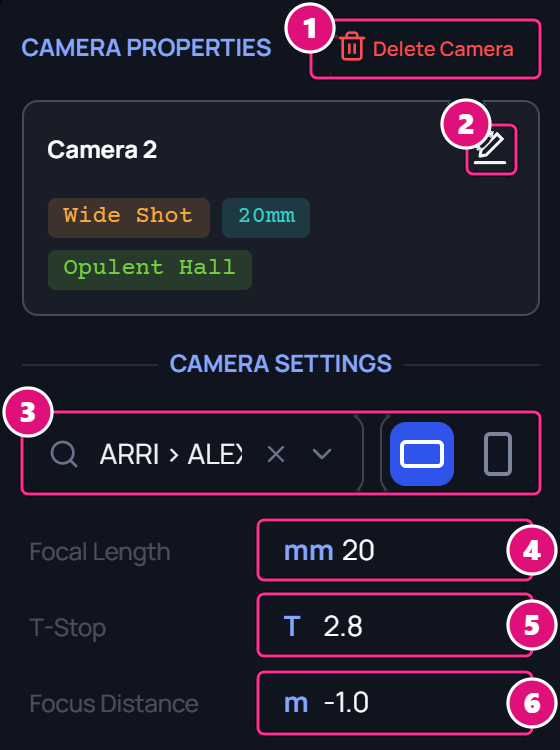
  1. Delete Camera
  2. Edit the camera
  3. Preset
  4. Focal Length
  5. T-Stop
  6. Focus Distance
The pencil opens Edit Camera to change those details. Click Update Camera to save.

Set the lens

Pick a body and sensor in the preset list, and landscape or portrait beside it. Then set the lens values:
  • Focal Length, in mm. The camera preview changes as you type.
  • T-Stop, from 2.2 to 22.
  • Focus Distance, in meters, up to 60. A new camera starts at -1.0.
A fixed lens shows T-Stop and Focus Distance grayed out.

Place and frame

Enter the camera’s Position and Rotation in Camera Properties, and watch the camera preview. Press Shift+F to enlarge the preview over the canvas, and again to shrink it.

Aim at a target

Aim At keeps the camera pointed at its subject.
  1. Give the camera a Subject: click the pencil, choose an object, then Update Camera.
  2. Click Aim At. The camera turns to the subject.
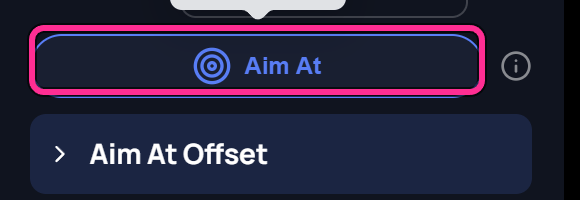
Camera Properties, with a box on the Aim At button, which is on, and Aim At Offset below it. Aim At Offset shifts the aim point.

Parent to an object or part

A parented camera follows the object’s motion. Open Parent and choose an object, or one of its parts, marked ↳. Choose None (world) to set it free. The Parent list, open. Box 1 is on the list, 2 on the parts Shade and Pole under P5 desk lamp mesh, and 3 on the eyedropper.
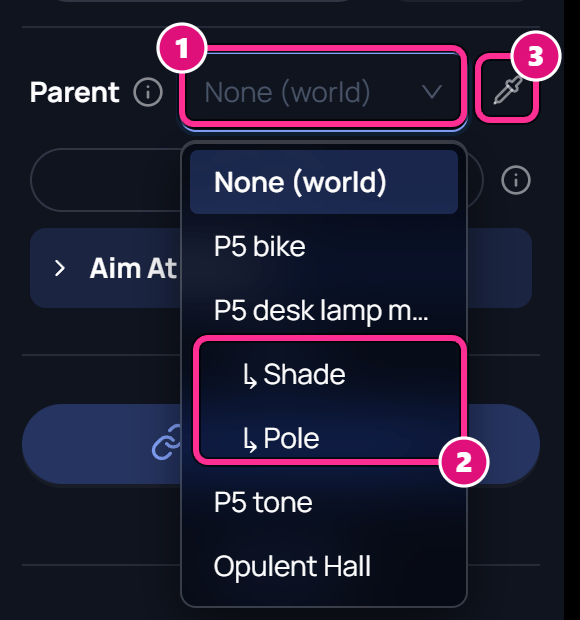
  1. Parent
  2. Parts
  3. Pick in the canvas
To pick in the canvas instead, click the eyedropper, then click what the camera should follow. See Parts of an object.

Change duration

A camera runs from its first keyframe to its last, shown as a bar on its Timeline row. To make it longer, add a keyframe later on. See Animate with keyframes.

Track script coverage

Link a camera to the script lines it covers.
1

Open the script

In Camera Properties, click Link script lines. The Script tab opens.The Script section of Camera Properties, with a box on Link script lines.
2

Select the lines

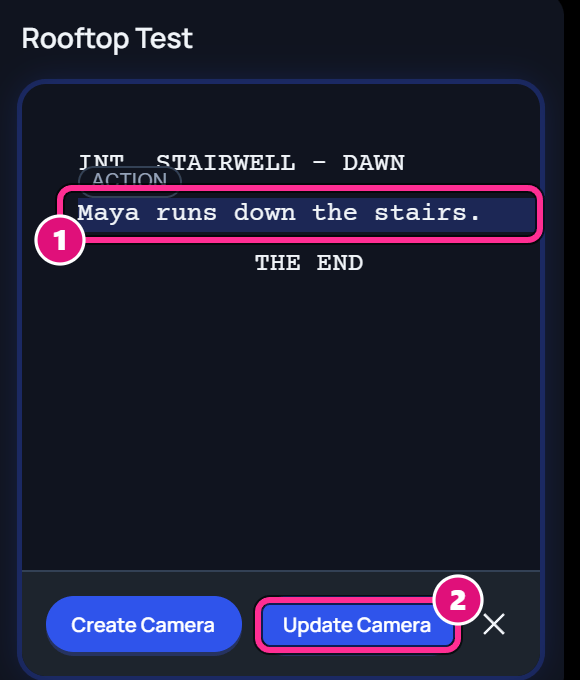
Drag across the lines, then click Update Camera.The Script tab with the line Maya runs down the stairs selected. Box 1 is on the line and 2 on Update Camera.
  1. Selected line
  2. Update Camera
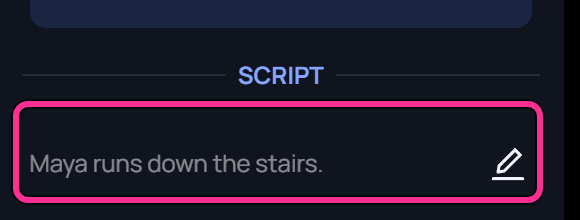
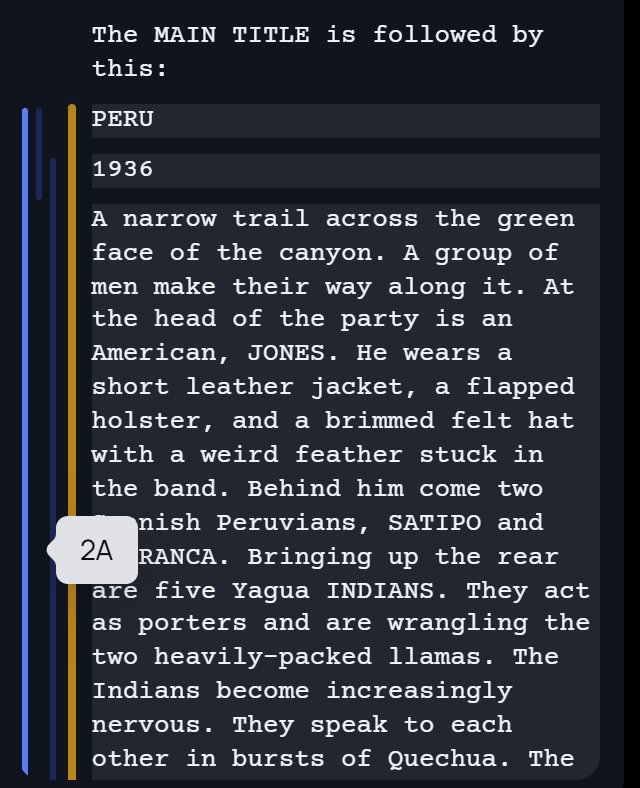
The lines then show under Script in Camera Properties, with a pencil to change them. The Script section of Camera Properties, with a box on the linked line Maya runs down the stairs and its pencil. In the Script tab, each camera draws its own thin coverage line beside the lines it covers. The Script tab with coverage lines beside the script. The pointer is on one blue line, which shows the camera name 2A and tints the lines it covers. An orange line runs beside it.
  • Point at a line to see the camera’s name and tint the script lines it covers.
  • Click a line to select its camera.
  • The orange line marks the camera at the playhead. It shows only while no camera is selected.

Delete a camera

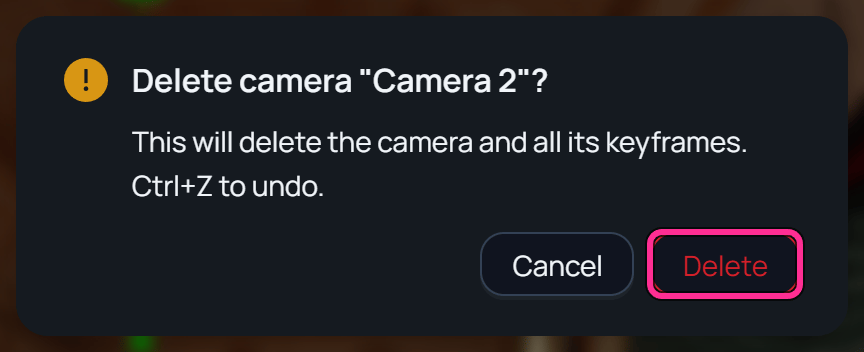
Click Delete Camera in Camera Properties, then Delete. Its keyframes go with it. Its takes stay in the Gallery, without a camera. Ctrl+Z brings the camera back and links its takes to it again. The window Delete camera Camera 2? This will delete the camera and all its keyframes. Ctrl+Z to undo. A box is on Delete.
Camera setups

Arrange a scene in several ways.

Timeline and animation

Keyframe a camera’s moves.