

Understanding setups and cameras
See mobile setups and cameras for jumping between setups and cameras, and bookmarking positions, once you’re navigating a scene.
Each scene can contain one or more setups. A setup is a named arrangement of the scene — objects added, moved, or removed, plus any per-setup animation. Every scene starts with one automatic Base Setup covering the scene as authored; add more (Setup A, Setup B, and so on) to cover the same scene from a different arrangement without disturbing the others.
A setup can hold one or more cameras. A camera defines a position, orientation, movement, and duration. By default, the Base Setup starts with one camera tied to its script heading, named Camera 1.
The active setup
Only one setup is active at a time. The outliner and timeline both mark it with an accent bar and a bold name. The active setup is your write target — edits to objects, animation, or cameras land in whichever setup is active. Selecting a camera activates its setup automatically; clicking a setup row (or its Objects/Cameras folder) activates that setup directly. The chip at the bottom left of the 3D canvas names the setup the canvas is showing. Click it to switch to another setup.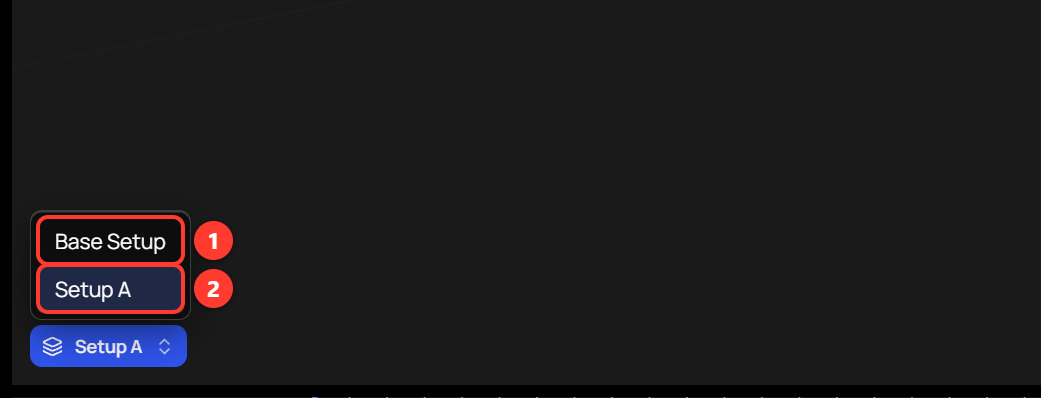
- Base Setup is the scene as authored. Every scene has it.
- Setup A is a setup added to this scene. More setups appear here as you add them.
Setups in the outliner
Each setup expands into two folders:- Objects — every object composed into that setup, including ones inherited from the Base Setup.
- Cameras — the cameras that belong to that setup.
Hiding an object in one setup
The eye on an object’s row hides the object in the active setup only. Other setups still show it.- Click the setup you want to change, such as Setup A, to make it active.
- Click the object’s row in that setup.
- Click the eye on the row.
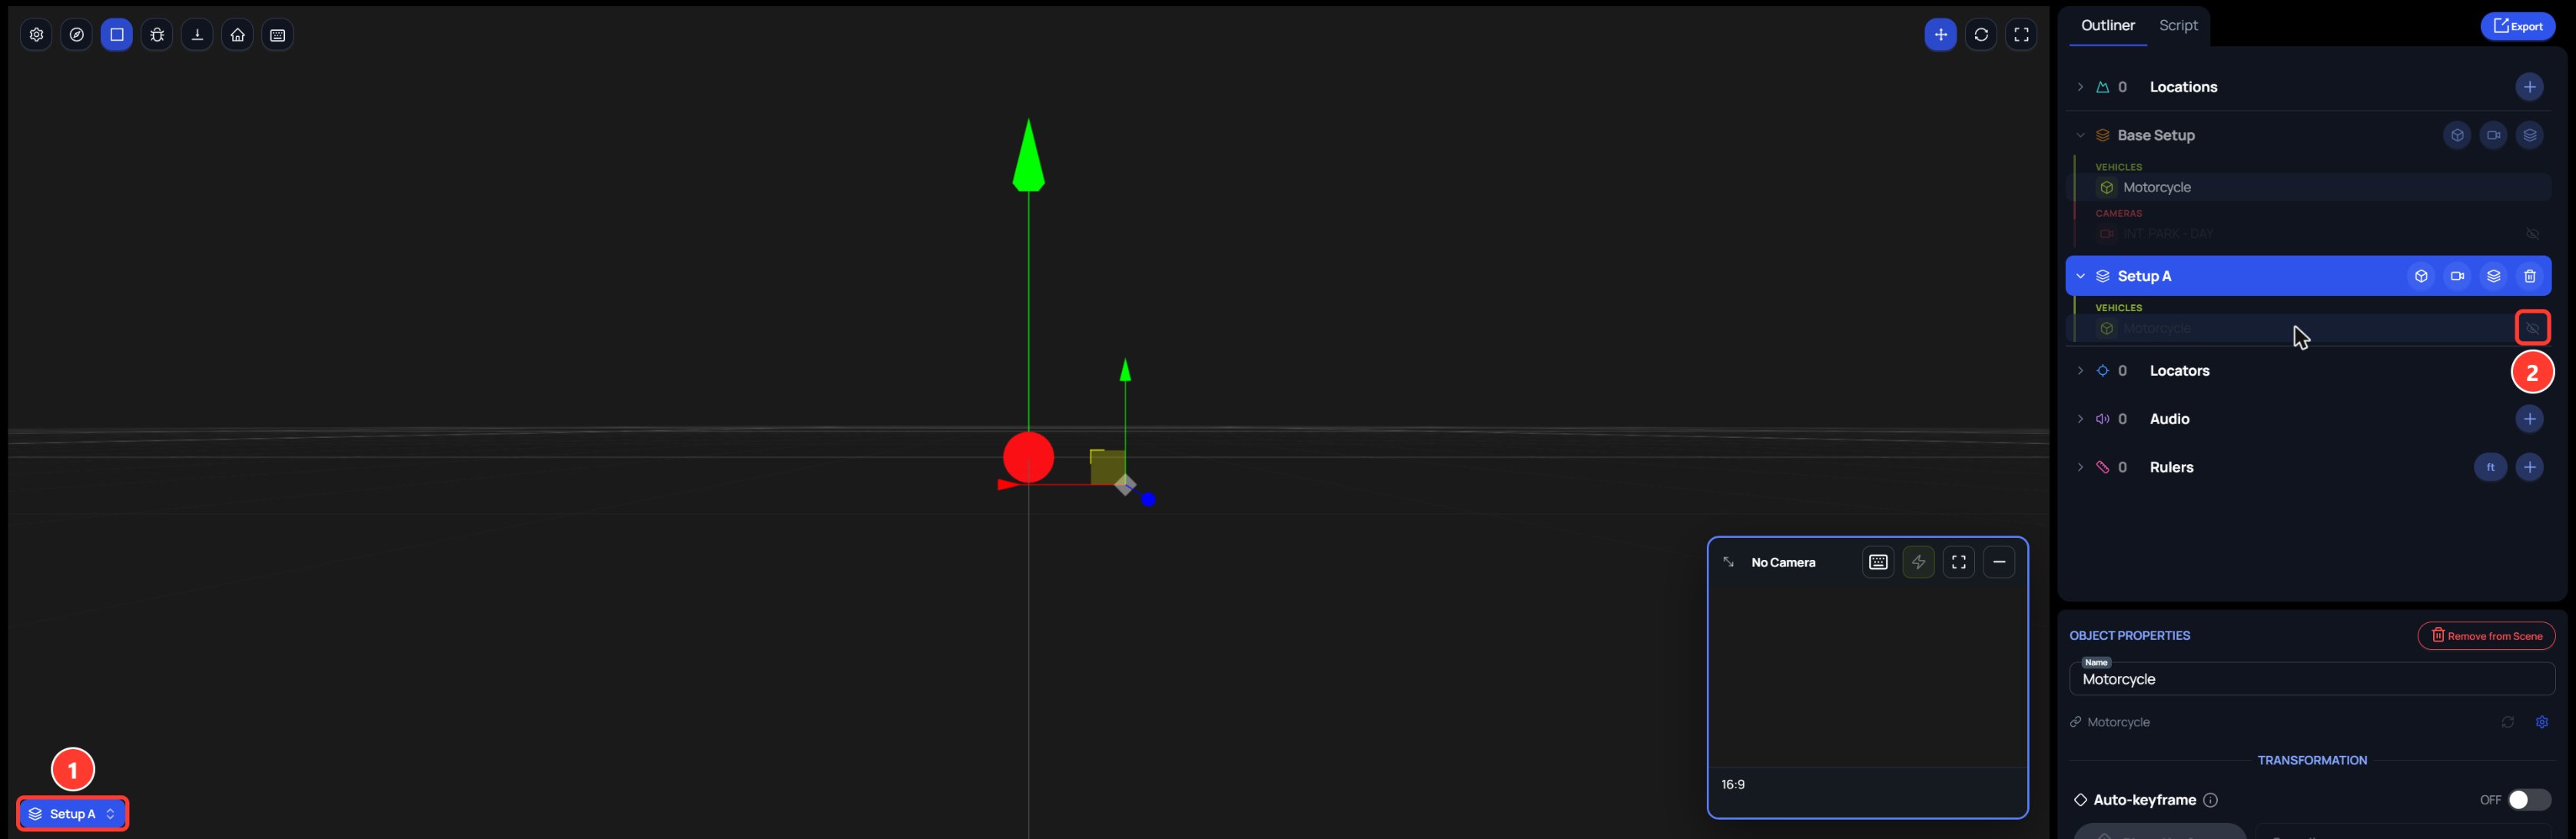
- The chip names the active setup, Setup A.
- The crossed-out eye marks the object as hidden in this setup. Click it to show the object again.
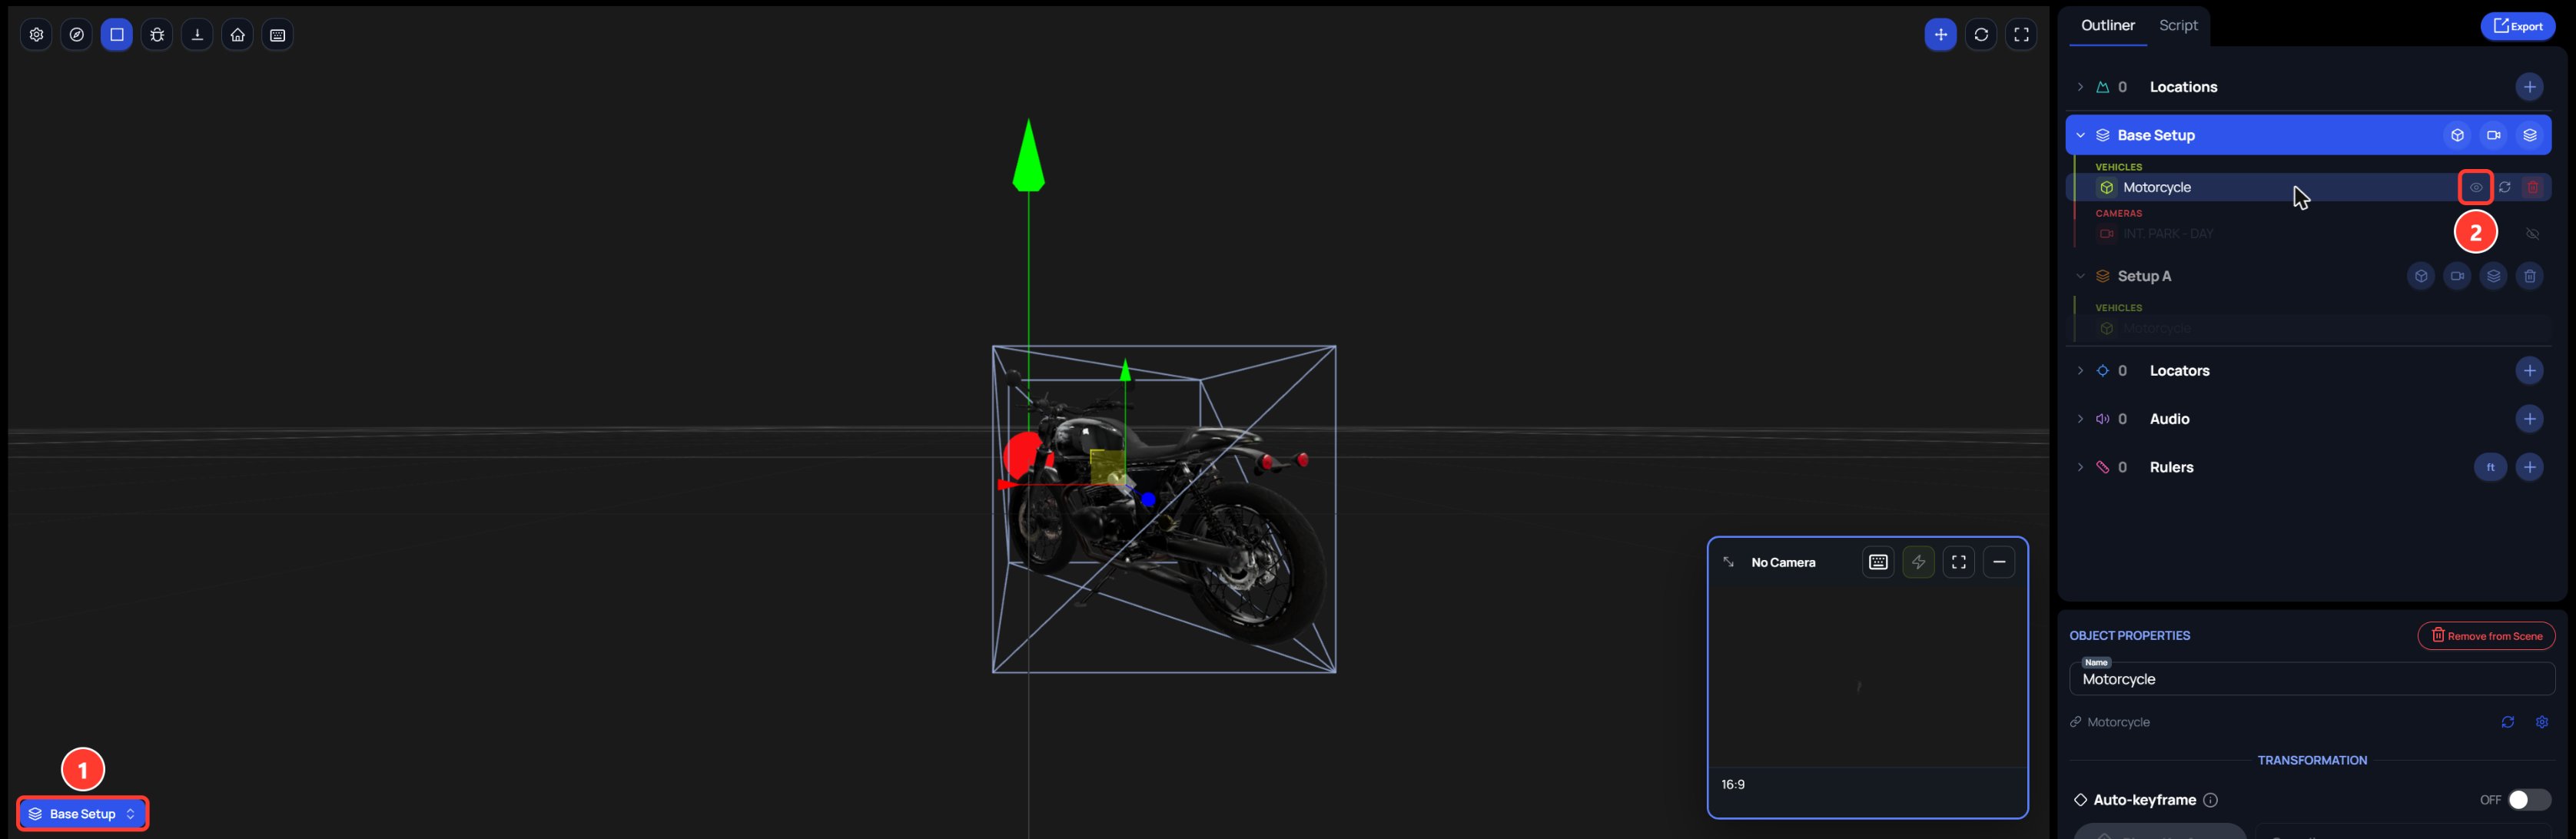
- The chip names the active setup, Base Setup.
- The open eye shows the object is visible in this setup.
Hidden objects are saved in your web browser. Another browser, another person, and the Spark iOS app still show them.
Viewing cameras
Cameras appear in the 3D canvas as camera icons with a frustum showing their field of view. Select a camera to see its framing in the viewport.Creating a setup
- In the outliner, find the row of the setup you want to start from, such as Base Setup, and click Clone this setup on that row. The new setup is named with the next letter (Setup A, Setup B, and so on) and becomes the active setup.
- Objects you add or move while this setup is active apply only to it — the Base Setup and other setups are unaffected.
Adding a camera from the script panel
To add a camera with script-line attribution:- Open the Script tab on the right side of the 3D canvas.
- Highlight the line or block of script this camera covers.
- Click New Camera.
- Name — Prefilled with a sequential number (e.g., “Camera 4”). Override for a more descriptive name.
- Preset — Choose a camera type preset.
- Lens — Select from real lens models. Pick the one you plan to shoot on so what you see in the Spark web app matches what you get on set.
- Objects — Select which objects the camera covers.
- Description — Optional notes about the camera.
Setting manual keyframes
For precise camera animation, set keyframes manually:- Move the playhead to the desired time on the timeline.
- Position the camera in the viewport.
- Set a keyframe to lock the camera’s position and rotation at that frame.
Camera targeting
To follow a moving target, select the camera, toggle Keyframes on, then choose one of these targeting modes:
- Aim At — The camera rotates to track the target while staying in place. Select the target object from the dropdown. Add a keyframe at the start of the move — without Keyframes on, Aim At appears to work in the moment but quietly loses its target on playback.
- Parent — The camera physically rides with the target (useful for vehicle interiors or dolly moves). The camera inherits the target’s movement.
Parenting a camera to a part
An imported USD object can hold parts that move on their own, such as a character or a car inside a larger file. A camera parented to the whole object follows the object’s root, which may not move at all. Parent the camera to the moving part instead.- Select the camera and open the Parent list.
- The list shows None (world), then each object. Under an object, its moving parts are indented and marked with ↳. An object whose root does not move is marked (doesn’t move).
- Choose the part.
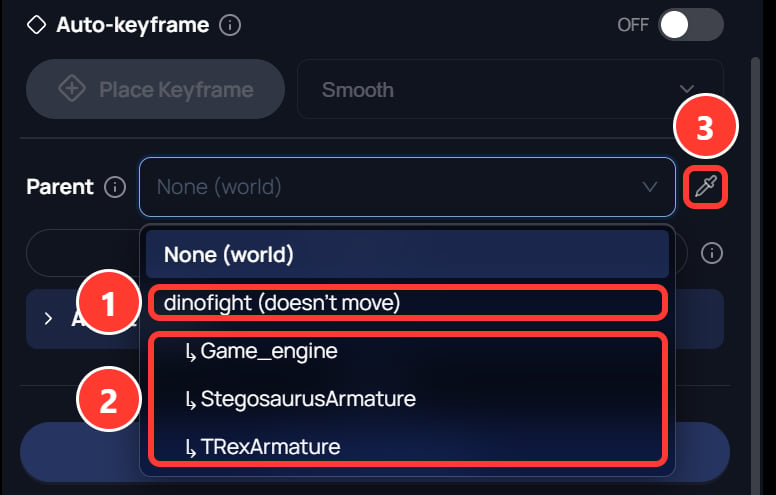
- The object. (doesn’t move) means its root stays still, so a camera parented here follows nothing.
- The object’s moving parts. Choose one of these.
- The eyedropper, for picking the part in the 3D canvas.