Tracking Markers
Use these guidelines to set up tracking markers for quick tracking refinement and easy compositing.
Tracking Markers
Jetset and Jetset Cine can already record high quality tracking data in real time, so why are tracking markers useful, and when should we use them?
Tracking Refinement
Jetset Pro and Jetset Cine have a unique ability to record 3 matching sets of data:
- Per-frame 3D position and orientation of the cine camera, including the offset between the iPhone lens and the cine camera lens
- An accurate lens calibration of either the iPhone camera (Jetset Pro) or the attached cine camera lens (Jetset Cine.)
- A centimeter-accurate 3D scan of the set in the direction of the shot that is automatically coordinate matched to the camera position and orientation from #1.
This makes it possible to refine or retrack a shot very quickly, in minutes instead of hours or days.
There are 2 major techniques that both use the same basic information:
This method uses a tracking program like SynthEyes to detect trackable points in the 3D scene, and then uses the initial real time Jetset tracking data to ‘project’ 3D trackers onto the scanned mesh from the scene. This creates 3D survey data that constrains the SynthEyes solver to the same position, orientation, and field of view that the original Jetset shot had! This massively simplifies an otherwise very difficult post production tracking refinement task.
This method uses GeoTracker’s optical flow analysis tool to measure the individual pixel motions of the camera original footage, and then uses the Jetset-scanned scene geometry to automatically set alignment keyframes and automate the tracking process inside Blender or Nuke.
Marker Color
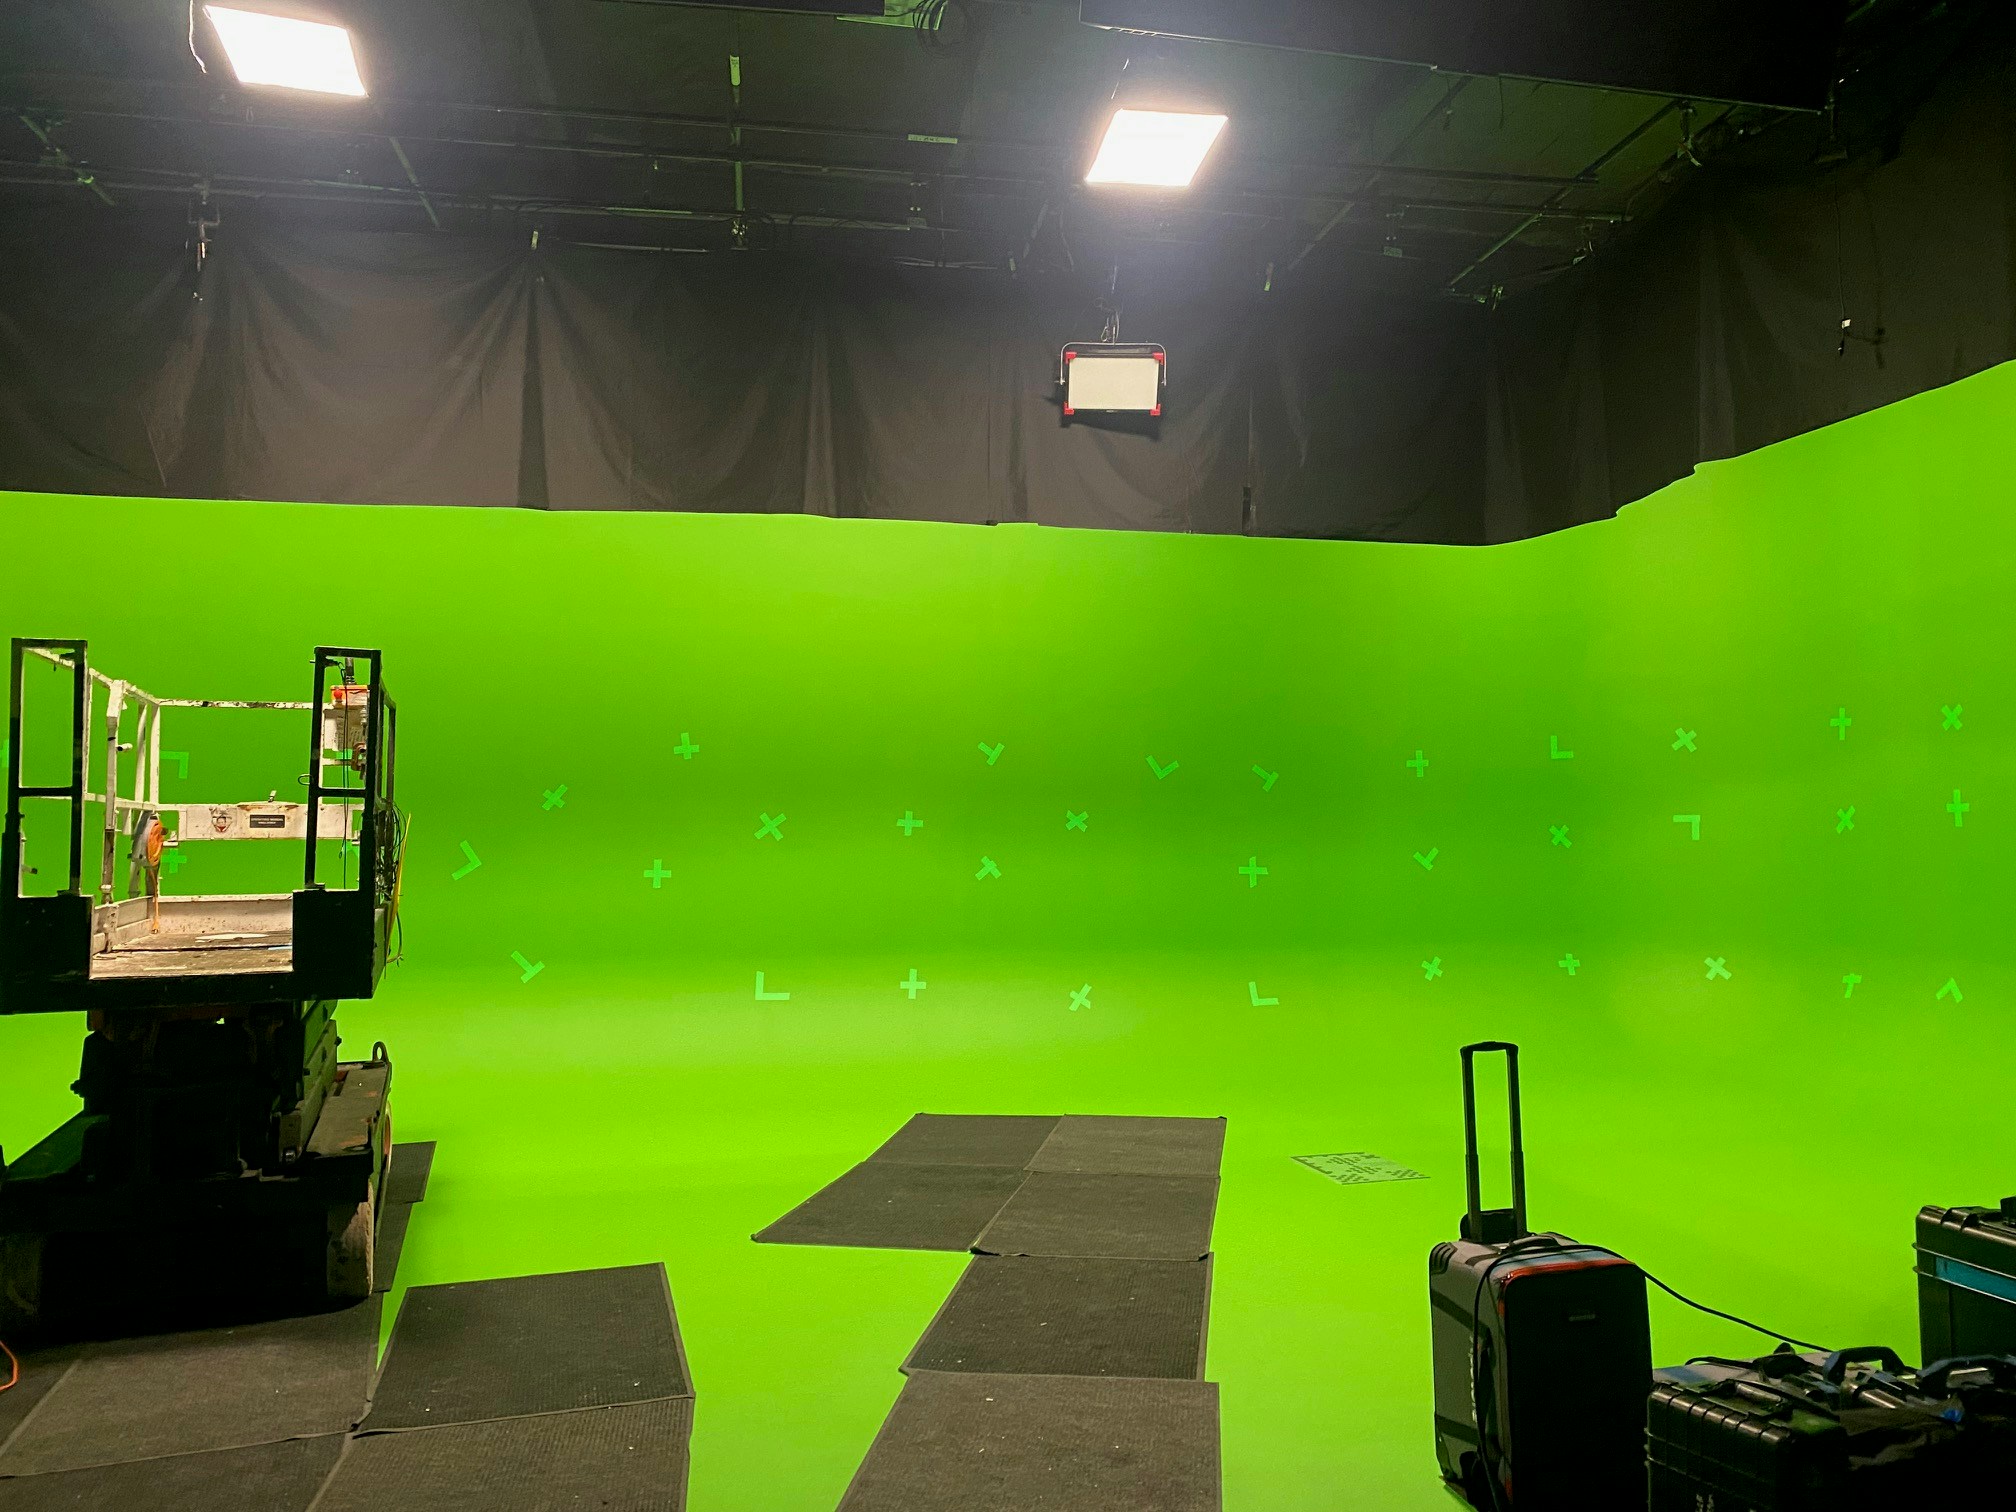
The tracking marker color should be more or less the same color as the background screen (green or blue), but just different enough that the post tracking software can detect corner features. See the above image for a good example of a tape color that is different enough to be detected.
Marker Shapes
Good results can be obtained with either round markers or markers that are cut into strips to create corner features. The important thing is that the tracking software has to be configured to detect either ‘dots/circles’ or ‘corners’.
Our SynthEyes script is automatically configured to set SynthEyes to detect corner features, so we recommend tape patterns like the one above.
Note that the tape stripes are not all identical orientations; this is done so that the ‘search patterns’ in the tracking software don’t accidentally ‘jump’ from one marker to the next.
Marker Coverage
Marker coverage is driven by 2 separate goals:
- You typically want quite a few markers in the shot, so that you can detect enough points for the refinement solve to work, but:
- You don’t want your actor’s hair to cross the markers, as it makes keying more difficult.
The usual answer is to add quite a few markers to the wall (and/or floor) of the greenscreen area, and then remove / reposition any markers that are directly behind the actors for a particular shot to avoid keying problems. The markers can be rapidly put back roughly where they were for the next shot.
It’s not important that the markers go back exactly where they were. The marker detection process happens on a per-shot basis. You can see an example of an automated marker detection script used in this tutorial.
If you have a moving camera shot where the actor needs to cross the markers, there are some clever advanced keying workflows that can automatically remove the tape marks from the background, but the tape mark color needs to be similar to the background color as mentioned above for this to work.